The Armorgard VoltHub:
Complete UK Guide
Everything site managers, health & safety officers, and procurement teams need to know, from initial setup and daily operation to annual servicing and 4G GSM fire alerts.
What Is the Armorgard VoltHub?
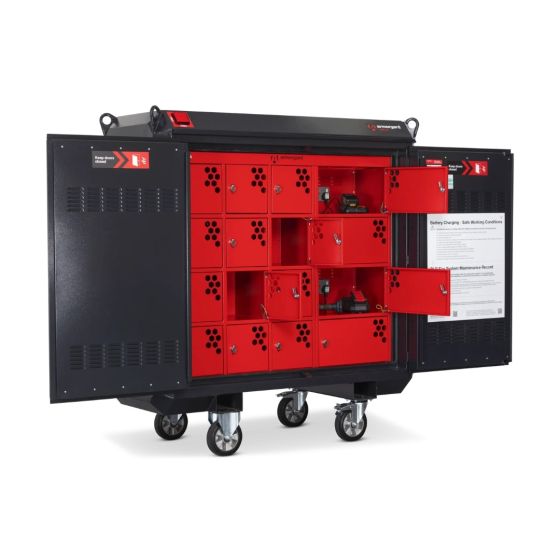
The Armorgard VoltHub (model code VH16-240) is a self-contained, IP-rated Li-ion battery charging and storage station, specifically engineered to eliminate the fire risk associated with unmanaged lithium-ion tool battery charging on construction sites and in industrial facilities across the UK.
Lithium-ion batteries power the majority of modern cordless power tools, from SDS drills and angle grinders to site lighting and electric screwdrivers. While these batteries deliver outstanding performance, they carry a known risk of thermal runaway: a self-reinforcing chain reaction that can cause a battery to rapidly heat, combust, and emit toxic gases, often with little warning. The VoltHub directly addresses this hazard by providing a controlled, monitored, and fire-suppressed environment for charging and overnight storage.
Available in 240V, the VoltHub is suitable for indoor and outdoor deployment and features a DLP (Direct Low Pressure) automatic fire suppression system, negative pressure ventilation, local fire alarm beacon, and optional 4G GSM remote alert connectivity, making it one of the most comprehensively specified Li-ion safety solutions available in the UK market.
The unit is suitable for tool battery sizes up to 350Wh per compartment (subject to OEM certification, no physical damage, and regular inspection), covers both small tool packs and larger energy storage modules, and holds 16 batteries simultaneously across individual lockable red compartments.
As part of your site fire risk assessment, Armorgard requires that your local fire department is informed of the VoltHub's presence, location, and operation. For larger facilities with emergency response plans, the unit must be logged as a point of interest. This ensures first responders understand the unit's built-in suppression capabilities before arriving on scene.
Key Features at a Glance
The VoltHub combines passive containment, active fire suppression, environmental monitoring, and remote alerting into a single deployable unit. Here is what sets it apart from standard charging cabinets.
DLP Automatic Fire Suppression
A 6-litre Direct Low Pressure fire suppression system activates automatically when a fire event is detected via the internal detection hose. The suppressant is contained in the unit's bunded sump. No manual intervention is required.
Negative Pressure Ventilation
An active fan-driven ventilation system maintains negative pressure inside the unit, directing any gas, smoke, or fumes away from the user and, when ducted for indoor use, safely out of the building via 150mm exhaust ducting.
60°C Critical Temperature Alarm
If the internal temperature exceeds 60°C, power to the sockets is automatically isolated and charging halted. A flashing red LED and audible alarm alert personnel immediately, preventing further thermal escalation.
12V Battery Backup System
All safety systems, including the ventilation fan, local fire beacon, and GSM module, continue to operate on an internal 12V battery backup, independent of mains power. The voltmeter should read ≥12.6V at all times.
IP55 & All-Weather Construction
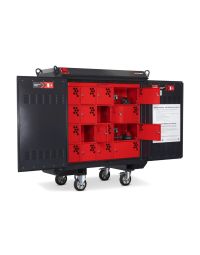
Rated IP55 for dust and water resistance, the VoltHub is deployable outdoors as well as indoors. The heavy-gauge steel body, powder-coated finish, and crane lifting eyes make it suitable for active construction sites.
SP21 External Fire Alarm Interface
A volt-free 3-pin SP21 connector allows the VoltHub to integrate with most site-wide wireless fire alarm systems, triggering building-wide evacuation if a fire event is detected within the charging station.
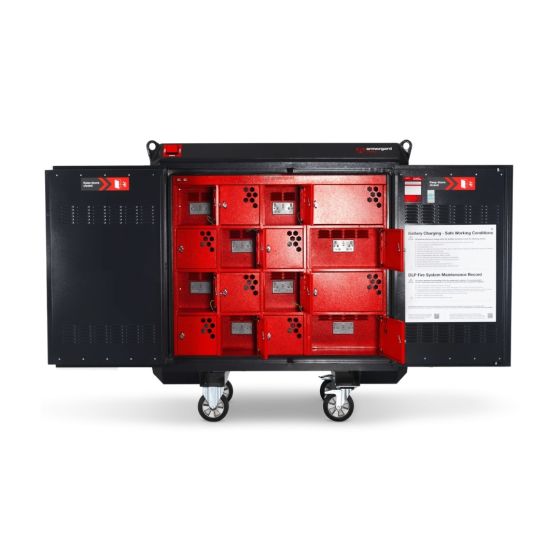
16 × Individually Lockable Lockers
Each red locker compartment accepts padlocks up to 20mm depth. Small lockers measure 260×355×260mm and large lockers 475×355×260mm, each with a 40kg UDL rating. Sockets are for battery chargers only, not for tools or extension leads.
Optional 4G GSM Remote Alerts
An optional GSM module adds real-time SMS and phone call notifications to up to three contacts in the event of a fire or reset. The module operates on a standard SIM card and is fully programmable by text message.
Heavy-Duty Castor Mobility
Four heavy-duty castors (2× fixed, 2× swivel-braked) allow easy repositioning across flat, hard-standing surfaces. Forklift pockets and crane lifting eyes are provided for longer-distance moves and site relocations.
Operating the VoltHub: Step by Step
The VoltHub arrives fully tested and is ready to plug in and use. No electrical modifications are permitted. The following steps cover initial power-up, daily use, and essential safety checks.
Before You Begin
On delivery, connect the VoltHub to mains power for a minimum of 48 hours before first use. This fully charges the internal 12V battery backup that powers all safety systems during a mains failure or fire event. Make a note of the unit's serial number on the right-hand side data plate; you will need it for warranty, service, and key replacement purposes.
Ensure the VoltHub is positioned on flat, stable ground at least 1 metre from surrounding walls. Lock all four castors. When using indoors, the rear ventilation must be ducted outside (see Installation section). Never position the unit near hot works, naked flames, DSEAR zones, or smoking areas.
Powering On
Open all locker doors before plugging in, to allow visual inspection. Connect the supplied IP67 extension lead to the power inlet, insert and twist the locking collar anti-clockwise to secure. Turn the isolator switch to the ON position. You will hear two audible beeps from the critical temperature alarm and see the red LED fire beacon illuminate for five seconds, confirming all emergency systems are functioning. If this does not occur within 48 hours of first charge, contact Armorgard.
Placing Batteries for Charging
Always charge batteries inside the red locker compartments with the doors closed. Before placing any battery in a locker, carry out the following checks: inspect the case for physical damage, swelling, or leaks; verify no corrosion on charging terminals; confirm the battery is dry; check for any error lights or warnings on the battery or charger. Only OEM-certified chargers and batteries should be used.
Space chargers at least 5cm apart, push all leads fully to the rear before closing the locker door, and do not stack batteries on top of one another. Maximum energy capacity per locker is 350Wh. Never store combustible material inside the lockers. Do not use multi-socket extension leads inside the unit.
Shutting Down
When not in use or unattended, turn the isolator switch to the OFF position. However, the VoltHub should remain plugged into mains power at all times, even when switched off, so the internal 12V battery backup remains fully charged and all safety monitoring continues to operate. Remove batteries once they are fully charged; do not leave batteries on charge indefinitely.
Temperature Alert Response
If the internal temperature exceeds 60°C, the power isolates automatically, the red LED flashes, and the audible alarm sounds. Turn the isolator to OFF (keeping the unit plugged in) to silence the alarm. Allow the unit time to cool, then switch back to ON. If the alarm sounds again, repeat and allow more cooling time. If the alarm is sounding but the ventilation fan cannot be heard, contact Armorgard immediately. Do not attempt to open the unit.
If the red fire beacon is flashing and the siren is active due to a fire event, not a temperature warning, do not approach or open the unit under any circumstances. Call 999 immediately.
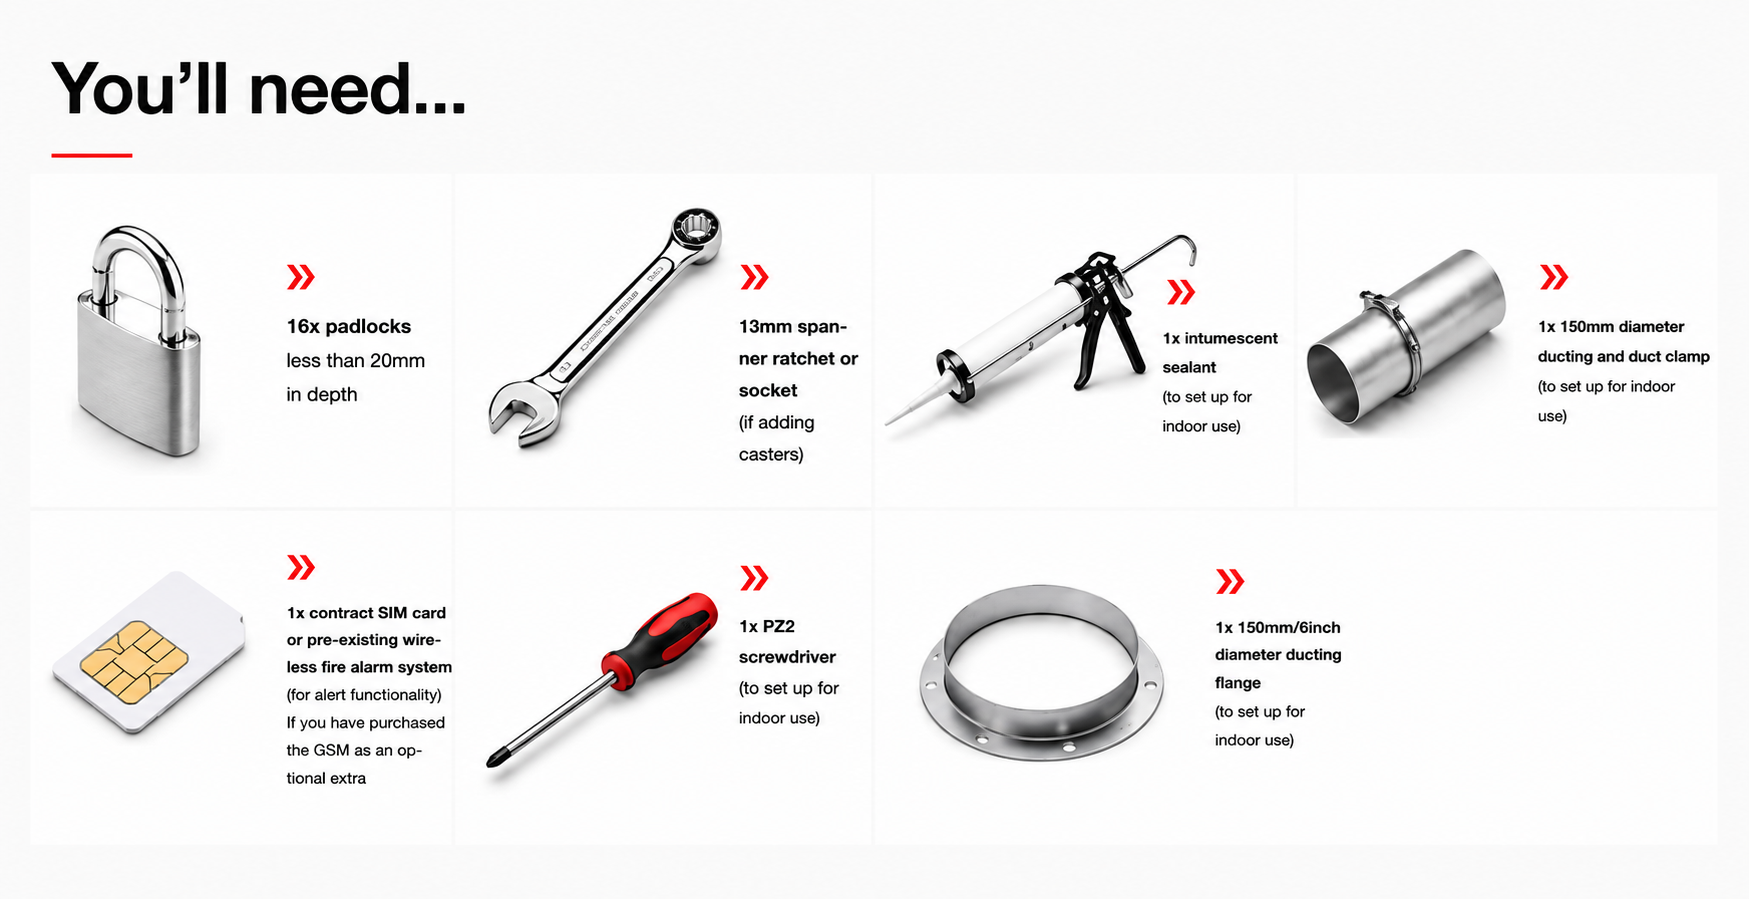
What You'll Need
Before deploying the VoltHub, make sure you have the following items ready. Some are required for basic operation, others are specific to indoor installation or optional GSM alert setup.
Battery Safety Requirements
The VoltHub significantly reduces fire risk, but only when used in conjunction with responsible battery and charger management. The following do's and don'ts are drawn directly from Armorgard's official guidance and must be followed by all personnel.
✓ Do
- Inspect batteries for damage, swelling, or leaks before charging
- Check charging terminals are free from corrosion
- Use OEM-certified chargers and batteries only
- Space chargers at least 5cm apart
- Push all leads to the rear before closing doors
- Remove batteries promptly once fully charged
- Keep doors closed and locked when not in use
- Follow all sticker guidance on the unit
- Situate the VoltHub away from exit routes
- Set up a remote alert system (GSM or wireless fire alarm)
- Keep all PAT test records up to date
✗ Don't
- Charge batteries larger than 350Wh per locker
- Use non-OEM or uncertified chargers
- Store combustible material inside lockers
- Use multi-socket extension leads inside the unit
- Stack batteries on top of each other
- Leave locker doors open under any circumstances
- Leave castors unlocked when the unit is stationary
- Store batteries at full charge for extended periods
- Exceed the 40kg UDL per locker
- Run extension leads from the locker sockets
- Use the VoltHub to power tools, only chargers
Weekly Maintenance Checklist
Armorgard specifies a mandatory visual inspection of the DLP fire suppression system every seven days, carried out by a competent person. This is a legal and warranty requirement. The checks are straightforward and take no more than a few minutes.
The weekly checks focus on three critical systems: the suppressant pressure gauges, the fire detection hose, and the access hatch. Any anomaly observed during inspection must be reported immediately to Armorgard. Do not continue using the unit if pressure readings are outside the green zone or if detection hose damage is found.
| Check Item | What to Look For | Action if Issue Found |
|---|---|---|
| Suppressant Pressure Gauges | Both dial hands must be in the GREEN zone. Battery voltmeter reading ≥12.6V with green visible on gauge. | Return unit to Armorgard for inspection and recommissioning |
| Detection Hose Condition | Inspect for deep gouges, cuts, creasing, or folding. Hose must be seated in every friction clip. | If detached but undamaged, press back into clip. If damaged, return to Armorgard |
| Access Hatch (Top Centre Locker) | Hatch must be closed and cover plate securely fixed in place. | If cover plate is missing or damaged, contact Armorgard |
| Upper Rear Body | Check for excessive impact damage to the rear body of the unit. | Report to Armorgard if damage is found |
| Rubber Door Seals | Inspect condition of seals on all locker doors. | Replace if damaged; contact Armorgard for spares |
| Power Lead & Cables | Inspect charger leads for damage every time a locker door is opened. | Remove from use immediately if damaged |
In addition to the weekly fire suppression checks, Armorgard recommends inspecting the locks, forklift pockets, crane lifting eyes, plug sockets, and rubber door seals every three months. For units in high-use environments, carry out these structural checks more frequently. Annual electrical testing is the customer's responsibility.
Full Servicing Schedule: Weekly, Annual & 5-Year
Armorgard mandates that the complete fire suppression system is fully serviced every 12 months by a competent engineer holding relevant BAFE qualifications, or by Armorgard directly through a prearranged service plan. A 5-year major recommissioning is also required.
Armorgard strongly recommends setting up a service plan at the point of purchase. This ensures continuity of compliance, valid warranty coverage, and access to Armorgard's engineering team for recommissioning after any fire event.
Fire Suppression Visual Inspection
- Check both pressure gauges are in the GREEN zone
- Confirm battery voltmeter reads ≥12.6V
- Inspect detection hose for damage, cuts, creasing
- Confirm hose is seated in all friction clips
- Check access hatch is closed and cover plate secure
- Inspect rear body for excessive damage
- Check condition of rubber door seals
Full Fire System Service
- Visual inspection of both pressure gauges
- Remove & test gauges; confirm dials drop to zero when depressurised
- Clean and grease O-rings/seals before refitting
- Inspect all detection hose for damage (entire run)
- Test seal strength of all detection hose connections
- Remove and test pressure switch from DLP valve
- Check cylinder mounting bracket and T-clamp torque
- Inspect cylinder exterior for rust or corrosion
- Update cylinder label and inner door service record
Major Recommissioning
- Complete all annual service requirements
- Replace all fire detection tube found in the unit
- Replace the fire suppressant
- Full recommission by Armorgard engineers
- Unit must be returned to Armorgard for this service
Service Record Codes
Armorgard uses a standardised service record system on the inner door label. Engineers should record the following codes on every service visit:
| Code | Meaning |
|---|---|
| CS | Commissioning Service: initial product commission or recommission after a fire |
| F | Full Service: carried out annually |
| E | Extended Service: carried out every 5 years |
| PSN | Product Serial Number |
| ASR | Advised System Replacement |
| NSD | Next Service Date |
| ENG | Service Engineer name or ID |
| Weight (kg) | Gross weight of the suppressant at time of service |
After a Fire Event
In the event of a fire, once the threat has been fully neutralised and the unit verified safe by a person of appropriate authority, do not interfere with the unit in any way. The suppressant will be contained in the VoltHub's bunded sump. Armorgard must be contacted for recommissioning regardless of apparent damage level.
Armorgard will conduct a site visit to determine whether recommissioning is possible or whether the unit should be written off. Contaminated batteries, chargers, and waste materials must be disposed of through a Designated Collection Facility (DCF) in compliance with WEEE Directive requirements.
Armorgard products carry a 12-month manufacturer's warranty. Any unauthorised modifications, tampering with the fire suppression system, or failure to follow the servicing schedule will void the warranty. Replacement keys, locks, and castors are available for units up to five years old; your product serial number is required.
4G GSM Alarm Setup Guide
The VoltHub's optional 4G GSM module enables real-time fire alerts via SMS and phone call to up to three contacts. The module is programmed entirely by text message, no app or laptop is required, though a GSM Alarm app (select 'GL09' module type) is available on both iOS and Android.
Step 1: SIM Card Installation
The VoltHub GSM module is not supplied with a SIM card. You will need a standard-size (not Nano, not Micro) SIM card with 4G connectivity. Armorgard recommends a contract SIM from a provider with strong signal coverage at the unit's permanent location; use your mobile phone's signal indicator to confirm adequate coverage on site before committing to a placement.
Locate and remove the SIM card cover panel in the top left-hand locker compartment. Insert the SIM with the chip face to the left. Do not force it. Save the SIM card's phone number in your phone's contacts under the unit's name and location (e.g. "VoltHub – Zone 1 Warehouse") for instant identification during an emergency. Set the rocker switch to Programme mode before proceeding.
All programming is done by sending text messages from a registered phone number to the SIM card number in the module. The module must be connected to a 12V power supply before programming begins. After all steps are complete, switch the rocker back to Operation mode.
Add Alert Phone Numbers
Up to three numbers can be stored. The format depends on your preferred alert type:
SMS alerts only: prefix with @# and separate numbers with #
Example: @#07700900000#07700900001
Phone call alerts only: prefix with &#
Example: �#07700900001
Module responds with TEL OK or DIAL OK on success. To update numbers, simply resend, new numbers overwrite the old ones.
Set the Emergency Alert Message
This is the text all registered numbers will receive when a fire is detected. Make it descriptive and unambiguous, especially if multiple VoltHubs are monitored from the same phone.
Format: #1# followed by your message
Example: #1#VOLTHUB ALERT – ZONE 1 FIRE – WAREHOUSE
Module repeats the message back followed by OK to confirm.
Set the Reset Confirmation Message
When the smoke detector is reset (using the button behind the cover panel in the top left locker), the module sends a reset SMS to all registered numbers. Configure this message as follows:
Format: #0# followed by your message
Example: #0#VOLTHUB ZONE 1 – RESET – ALL CLEAR
Module responds with the message and OK to confirm.
Request a Status Report
At any time, send @#STATUS? to verify correct operation. The module responds with:
The response includes: SMS and DIAL phone numbers registered, last trigger date and time, DIN (door) state, armed/disarmed status, mode (M1/M2/M3), and the auto-report timer value.
Use this after any programming changes to confirm settings are correct.
Configure Alert Mode
You can switch between SMS-only, call-only, or both without changing stored phone numbers:
%#M1 → SMS only (responds: "Only SMS Report")
%#M2 → Phone calls only (responds: "Only Phone Report")
%#M3 → SMS and phone calls (responds: "SMS And Phone Report")
M3 is the recommended setting for maximum site awareness.
Auto Status Report Timer
The module sends a weekly status SMS to the first registered number by default. Adjust or disable as needed:
Set in minutes: %#T[minutes]
Example (daily): %#T1440
Example (weekly default): %#T10080
Disable: %#0
Maximum timer interval is 9,999 minutes (~7 days).
Low Battery Voltage Alert
Set a voltage threshold below which the module alerts you that the 12V backup battery is running low:
Format: %#LV[voltage]
Example: %#LV11
Module responds: "Low Voltage Alert Limit is 11.0"
Armorgard recommends setting this at 11V to provide adequate warning before the backup battery is critically depleted.
Arming / Disarming for Maintenance
Temporarily disarm the module without clearing programming, useful during engineer servicing visits:
Disarm for 10 minutes: Call the SIM number and hang up after 1 to 2 ring tones
Disarm for 60 minutes: Call and hold until the device closes the call
Module responds: "Disarmed"
Re-arm: Send @#ARM1, module responds "Armed"
Product Specifications
The VoltHub VH16-240 is a 240V mains-powered unit. Dimensions and key specifications are listed below.
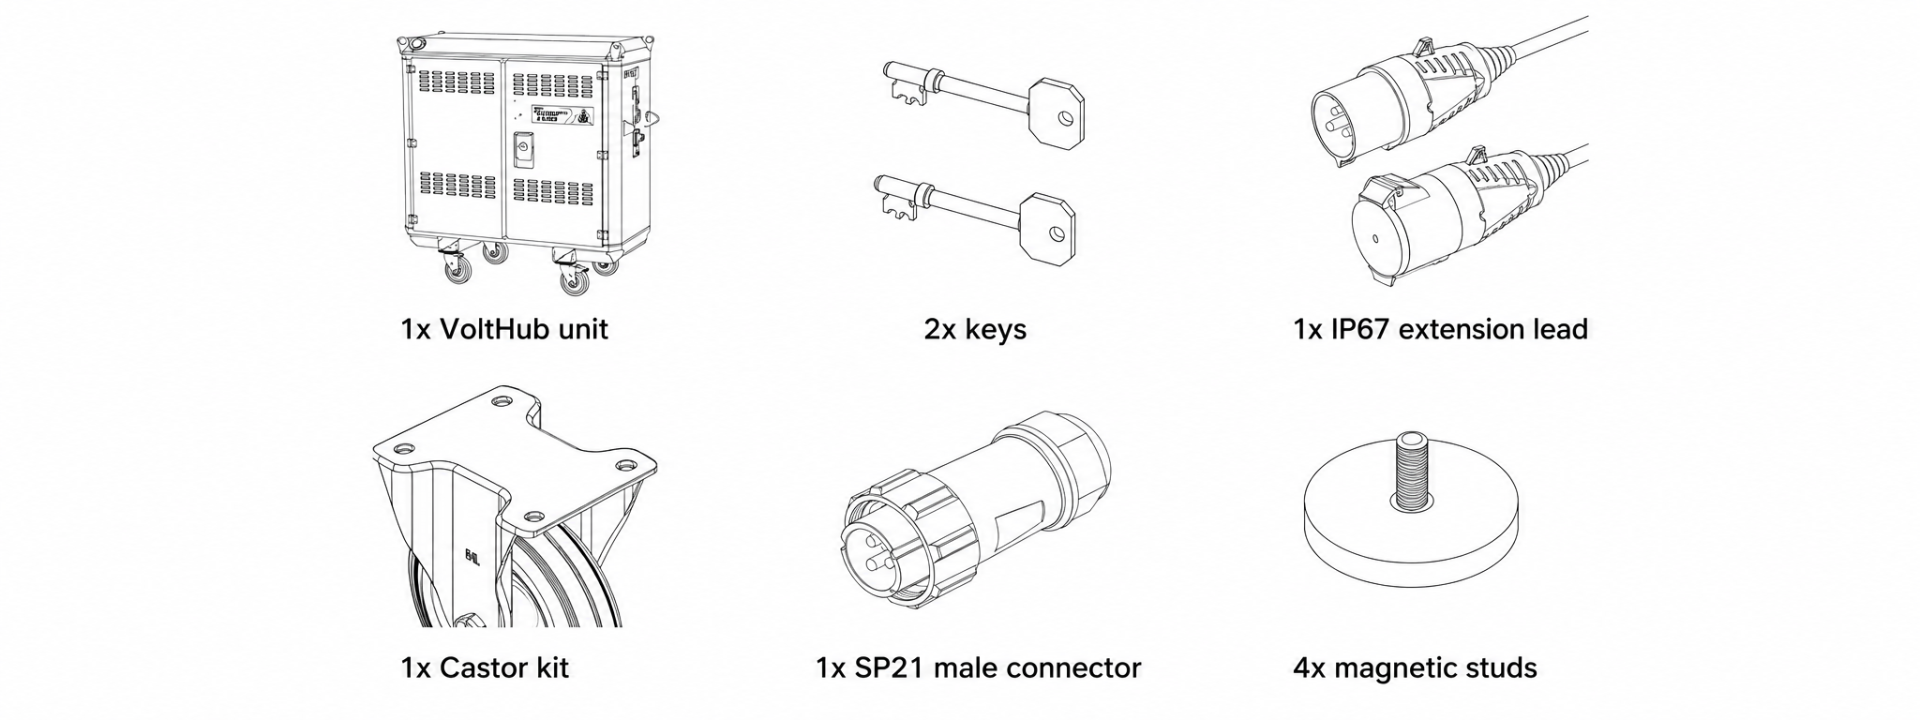
Every VoltHub ships with the unit, 2× keys, IP67 extension lead, castor kit, SP21 male connector, and 4× magnetic studs.
| Specification | VH16-240 (240V) |
|---|---|
| External Dimensions (W×D×H) | 1770 × 750 × 1820mm |
| Weight | 334kg |
| Small Locker Internal (W×D×H) | 260 × 355 × 260mm |
| Large Locker Internal (W×D×H) | 475 × 355 × 260mm |
| Total Lockers | 16 (individually lockable) |
| Max Battery Capacity Per Locker | 350Wh (OEM, undamaged) |
| Locker UDL Rating | 40kg per locker |
| Power Inlet | 240V 32A IP67 |
| Max Total Power Draw | 32A |
| Weather Rating | IP55 |
| Fire Suppression | 6-litre DLP (Direct Low Pressure) automatic |
| Battery Backup | 12V internal (must be maintained ≥12.6V) |
| Temperature Alarm Threshold | 60°C (auto-isolates charging power) |
| Operating Temperature | -10°C to +45°C |
| Ventilation Exhaust | 150mm diameter (ducting required for indoor use) |
| Mobility | 4× heavy-duty castors (2 fixed, 2 swivel-braked) + forklift pockets + crane eyes |
| Warranty | 12 months manufacturer's warranty |
| Standards | EN 60335-1:2012, EN 60335-2-29:2019, UK Electrical (Safety) Regulations 2008 |
| Fire Suppression Standard | LPCB LPS1666 (servicing); BS 5306-3:2017 & BS 5306-9:2015 (extinguisher) |
Indoor Installation
When deploying indoors, the VoltHub's rear ventilation must be connected to external ducting. Remove the rear ventilation panel using a PZ2 screwdriver, replace it with a 150mm/6-inch ducting flange (sealed with intumescent sealant to prevent leakage), connect 150mm ducting using a duct clamp, and route the opposing end to the outside atmosphere.
Note this exhaust outlet location in your site fire risk assessment. The exhaust location must be kept clear at all times and should be at least 1 metre clear of any obstructions. Never block the rear ventilation in any configuration.
Lifting & Transporting
The VoltHub must always be empty and doors locked before moving. For forklift moves, use only the fork pockets. Never lift from any other point. For crane lifts, a valid LOLER certificate must be in place, all four lifting eyes must be used simultaneously with a 4-leg chain or sling, and a risk assessment must be completed before the lift. Only qualified personnel may conduct crane lifts.
During road transport, the unit must be fully strapped to the carrier. Disconnect the supply lead by twisting the locking collar clockwise and pulling directly out. The VoltHub should never be lifted when loaded.